In Whiteout Survival, Troops play a central role in nearly every aspect of the game. Whether you’re launching attacks in PvP, competing in events like Frostfire Mine, Gathering Resources, or tackling various other challenges, Troops are crucial to your success. As a result, you’ll find yourself constantly building and upgrading them to stay competitive with other players. In this Whiteout Survival Troop Guide, we’ll explore the different types of Troops, their strengths and weaknesses, the resources needed to build them, and how to optimize their use for maximum efficiency and power.
Table of Contents
Overview

There are 3 different troop types in Whiteout Survival, each with a strength or weakness against one of the others. They can all be upgraded up to a maximum level of 11 in addition to being turned into special Fire Crystal Troops after meeting certain criteria. With each level, they gain better stats and buffs but also cost more time and resources to build. In the next sections of this Whiteout Survival Troop Guide, let’s explore all these features in more detail.
Levels
Troops in Whiteout Survival range from levels 1 to 11, with specific requirements for each. Your troop training building’s level limits troop levels 1–10, while level 11 Troops require entering the Fire Crystal Age and building the War Academy. Additionally, certain troop levels unlock buffs, as will be explored further in our section on Skills later on in this Whiteout Survival Troop Guide.
Fire Crystal
Reaching Furnace level 30 in Whiteout Survival is just the start, as the real excitement begins with the introduction of Fire Crystal buildings and troops. Troops can be upgraded up to Fire Crystal 10 (FC10), with each level providing significant stat boosts. To unlock Fire Crystal Troops, you must upgrade the Fire Crystal level of your troop training buildings. Once upgraded, your troops are automatically enhanced at no extra cost beyond the building upgrade itself. For a detailed breakdown of this mechanic and the total Fire Crystal cost, refer to our Whiteout Survival Fire Crystal Guide.
Stats

Of course, no Whiteout Survival Troop Guide would be complete without taking a look at stats. In Whiteout Survival, troops have seven distinct stats, each influencing their role and performance in different ways. Here’s a breakdown of these stats and their significance:
- Power: This stat doesn’t affect troop performance in battles. Instead, it reflects the amount of power added to your account when you train that troop. Higher-level troops contribute more power.
- Defense: Think of this as the troop’s armor. It absorbs damage from enemies, preventing them from directly harming the troop’s health until the defense is reduced to zero.
- Attack: This is the basic damage a troop can inflict. However, it’s limited by the enemy’s defense; no health damage is dealt until the opposing troop’s defense is depleted.
- Health: Essentially the HP of a troop. Once this reaches zero, the troop is defeated and removed from the battle.
- Lethality: A unique stat that allows a troop to bypass enemy defense and deal damage directly to their health, making it particularly useful against high-defense opponents.
- Speed: This uniform stat of 11 for all troops determines their movement speed in battles. Note that it’s different from Wilderness March Speed, which affects travel time on the map.
- Load: Relevant for looting and gathering, this stat indicates how much a troop can carry. Troops with higher load stats can gather resources or loot cities more efficiently, requiring fewer units to clear a spot.
Mechanics
Troops see their greatest influence when engaged in huge Expedition battles. This is separate from Exploration, where your Heroes play a much greater role in dealing direct damage. Expedition battles are turn-based with each turn seeing both sides selecting targets and dealing their respective damage. Typically, those closest to the troop are selected first, hence why Infantry Troops are there to soak up damage. However, Lancers, from level 7, do have a small chance to target Marksman instead, whilst some Hero Expedition Skills will do the same.
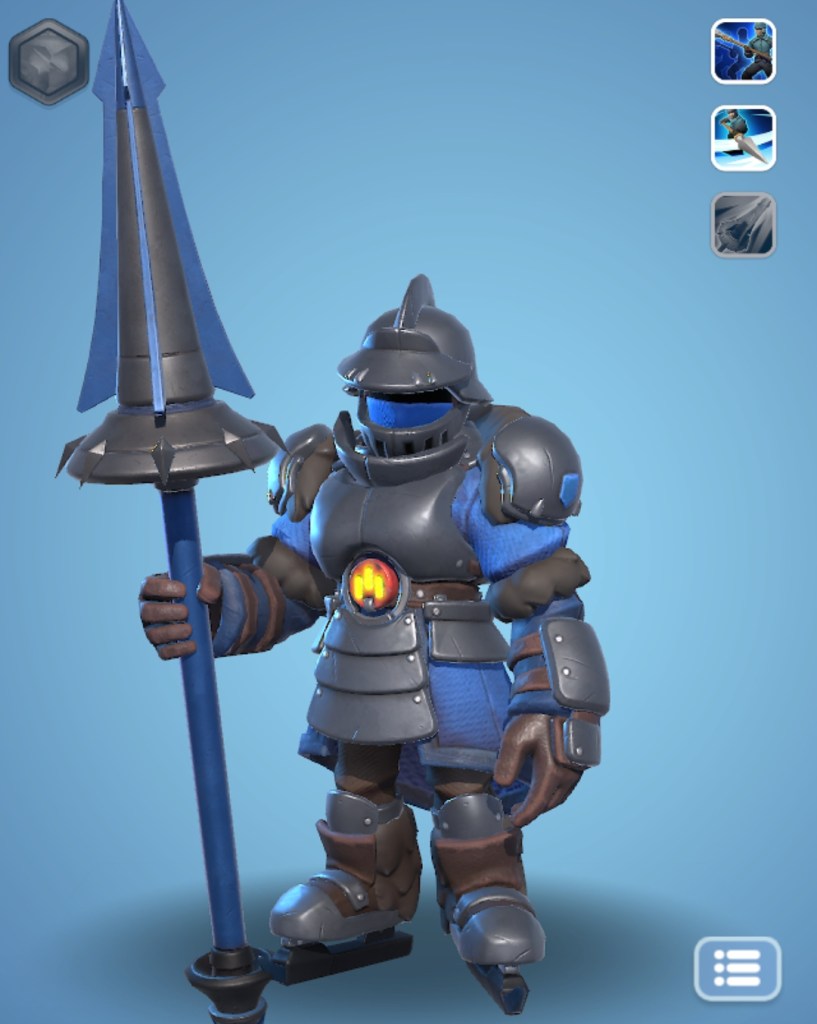
Infantry

Infantry Troops serve as the tanks of the battlefield, positioned on the frontline to absorb the brunt of incoming damage. With their high defense and health, they excel at soaking up attacks, creating a shield for troops positioned further back to deal damage from safety. However, Infantry Troops are not built for raw offense, as their damage output is relatively weak. To ensure a successful attack, you’ll need a balanced composition that includes more than just Infantry. Notably, Infantry Troops have a 10% attack bonus against Lancers, making them an effective counter to this troop type.
Cost
The below table outlines the total resources and time required to train 1 infantry at each tier. Make use of our Whiteout Survival Troop Training Calculator to calculate the total cost for training or promoting any number of troops.
| Tier | Meat | Wood | Coal | Iron | Time |
|---|---|---|---|---|---|
| 1 | 36 | 27 | 7 | 2 | 12s |
| 2 | 58 | 44 | 10 | 3 | 17s |
| 3 | 92 | 69 | 17 | 4 | 24s |
| 4 | 120 | 90 | 21 | 5 | 32s |
| 5 | 156 | 117 | 27 | 6 | 44s |
| 6 | 186 | 140 | 33 | 7 | 60s |
| 7 | 279 | 210 | 49 | 11 | 83s |
| 8 | 558 | 419 | 98 | 21 | 113s |
| 9 | 1,394 | 1,046 | 244 | 51 | 131s |
| 10 | 2,788 | 2,091 | 488 | 102 | 152s |
| 11 | 6,970 | 5,228 | 1,220 | 253 | 180s |
Stats
| Tier | Power | Defense | Lethality | Load | Attack | Health |
|---|---|---|---|---|---|---|
| 1 | 3 | 4 | 1 | 108 | 1 | 6 |
| 2 | 4 | 5 | 2 | 124 | 2 | 7 |
| 3 | 6 | 6 | 3 | 142 | 3 | 8 |
| 4 | 9 | 7 | 4 | 164 | 4 | 9 |
| 5 | 13 | 8 | 5 | 188 | 5 | 10 |
| 6 | 20 | 9 | 6 | 217 | 6 | 11 |
| 7 | 28 | 10 | 7 | 249 | 7 | 12 |
| 8 | 38 | 11 | 8 | 287 | 8 | 13 |
| 9 | 50 | 12 | 9 | 330 | 9 | 14 |
| 10 | 66 | 13 | 10 | 379 | 10 | 15 |
| 11 | 80 | 15 | 12 | 400 | 12 | 17 |
Fire Crystal
The table below highlights the stats of Infantry Fire Crystal Troops at each Fire Crystal level, focusing specifically on Tier 10 (T10) and Tier 11 (T11) troops. While Fire Crystal Troops can theoretically be built for all tiers from 1 to 11, in practice, you’ll primarily train T10s and T11s, as these are the most effective in battle. For simplicity, Load and Speed stats are not included, as they remain constant regardless of Fire Crystal level.
T10
| FC | Power | Defense | Lethality | Attack | Health |
|---|---|---|---|---|---|
| 0 | 66 | 13 | 10 | 10 | 15 |
| 1 | 71 | 14 | 10 | 11 | 16 |
| 2 | 76 | 16 | 11 | 12 | 17 |
| 3 | 83 | 17 | 12 | 13 | 18 |
| 4 | 88 | 18 | 13 | 13 | 19 |
| 5 | 94 | 20 | 13 | 14 | 20 |
| 6 | 99 | 21 | 13 | 14 | 21 |
| 7 | 104 | 22 | 14 | 15 | 22 |
| 8 | 110 | 23 | 15 | 15 | 23 |
| 9 | 115 | 25 | 15 | 16 | 24 |
| 10 | 121 | 26 | 16 | 18 | 25 |
T11
| FC | Power | Defense | Lethality | Attack | Health |
|---|---|---|---|---|---|
| 0 | 80 | 15 | 12 | 12 | 17 |
| 1 | 86 | 16 | 12 | 13 | 18 |
| 2 | 92 | 17 | 13 | 14 | 19 |
| 3 | 100 | 18 | 14 | 15 | 20 |
| 4 | 106 | 19 | 15 | 15 | 21 |
| 5 | 114 | 22 | 15 | 16 | 22 |
| 6 | 120 | 23 | 16 | 17 | 23 |
| 7 | 126 | 24 | 16 | 17 | 24 |
| 8 | 135 | 25 | 17 | 18 | 25 |
| 9 | 141 | 27 | 17 | 18 | 26 |
| 10 | 148 | 28 | 18 | 19 | 27 |
Skills
At specific levels, Troops gain skills that buff them in a certain way. Those gained by Infantry are as follows:
- Level 1: Master Brawler – Increases Attack Damage to Lancers by 10%.
- Level 7: Bands of Steel – Increases Defense against Lancers by 10%.
- FC3: Crystal Shield I – The Fire Crystal energy attached to the surface makes the shield impregnable and grants it a 25% chance of offsetting 36 damage.
- FC5: Crystal Shield II – The Fire Crystal energy attached to the surface makes the shield impregnable and grants it a 37.5% chance of offsetting 36 damage.
- FC8: Body of Light I – Fire Crystal energy forms an invisible shield that covers the bodies, increasing Infantry Defense by 4%, reducing an extra 10% damage when Crystal Shield is active.
- FC10: Body of Light II – Fire Crystal energy forms an invisible shield that covers the bodies, increasing Infantry Defense by 6%, reducing an extra 15% damage when Crystal Shield is active.
Lancers
Lancers strike a balance between the defensive capabilities of Infantry troops and the offensive power of Marksmen. With solid defensive stats and the ability to inflict respectable damage, they serve as versatile units on the battlefield. Positioned directly behind the Infantry, they step up as the next line of defense once the frontline is breached. Lancers are particularly valuable for countering enemy damage dealers, as they boast a 10% attack bonus against Marksmen, making them essential for disrupting the opposition’s primary sources of damage.
Cost
The below table outlines the total resources and time required to train 1 lancer at each tier. Make use of our Whiteout Survival Troop Training Calculator to calculate the total cost for training or promoting any number of troops.
| Tier | Meat | Wood | Coal | Iron | Time |
|---|---|---|---|---|---|
| 1 | 32 | 30 | 7 | 2 | 12 |
| 2 | 51 | 48 | 10 | 3 | 17 |
| 3 | 81 | 76 | 16 | 4 | 24 |
| 4 | 105 | 99 | 21 | 5 | 32 |
| 5 | 136 | 129 | 27 | 7 | 44 |
| 6 | 163 | 154 | 32 | 8 | 60 |
| 7 | 244 | 231 | 48 | 11 | 83 |
| 8 | 488 | 461 | 95 | 22 | 113 |
| 9 | 1,220 | 1,151 | 237 | 55 | 131 |
| 10 | 2,440 | 2,301 | 474 | 109 | 152 |
| 11 | 6,099 | 5,751 | 1,185 | 271 | 180 |
Stats
| Tier | Power | Defense | Lethality | Load | Attack | Health |
|---|---|---|---|---|---|---|
| 1 | 3 | 2 | 5 | 108 | 4 | 2 |
| 2 | 4 | 3 | 6 | 124 | 5 | 3 |
| 3 | 5 | 4 | 7 | 142 | 6 | 4 |
| 4 | 9 | 5 | 8 | 164 | 7 | 5 |
| 5 | 13 | 6 | 9 | 188 | 8 | 6 |
| 6 | 20 | 7 | 10 | 217 | 9 | 7 |
| 7 | 28 | 8 | 11 | 249 | 10 | 8 |
| 8 | 38 | 9 | 12 | 287 | 11 | 9 |
| 9 | 50 | 10 | 13 | 330 | 12 | 10 |
| 10 | 66 | 11 | 14 | 379 | 13 | 11 |
| 11 | 80 | 13 | 16 | 400 | 15 | 13 |
Fire Crystal
The table below highlights the stats of Lancer Fire Crystal Troops at each Fire Crystal level, focusing specifically on Tier 10 (T10) and Tier 11 (T11) troops. While Fire Crystal Troops can theoretically be built for all tiers from 1 to 11, in practice, you’ll primarily train T10s and T11s, as these are the most effective in battle. For simplicity, Load and Speed stats are not included, as they remain constant regardless of Fire Crystal level.
T10
| FC | Power | Defense | Lethality | Attack | Health |
|---|---|---|---|---|---|
| 0 | 66 | 11 | 14 | 13 | 11 |
| 1 | 71 | 12 | 15 | 14 | 11 |
| 2 | 76 | 13 | 16 | 16 | 12 |
| 3 | 83 | 14 | 17 | 17 | 13 |
| 4 | 88 | 14 | 18 | 18 | 13 |
| 5 | 94 | 15 | 19 | 20 | 14 |
| 6 | 99 | 15 | 20 | 21 | 14 |
| 7 | 104 | 16 | 21 | 22 | 15 |
| 8 | 110 | 17 | 22 | 23 | 15 |
| 9 | 115 | 17 | 23 | 25 | 16 |
| 10 | 121 | 19 | 24 | 26 | 17 |
T11
| FC | Power | Defense | Lethality | Attack | Health |
|---|---|---|---|---|---|
| 0 | 80 | 13 | 16 | 15 | 13 |
| 1 | 86 | 14 | 17 | 16 | 13 |
| 2 | 92 | 15 | 18 | 18 | 14 |
| 3 | 100 | 16 | 19 | 19 | 15 |
| 4 | 106 | 16 | 20 | 20 | 15 |
| 5 | 114 | 17 | 21 | 22 | 16 |
| 6 | 120 | 18 | 22 | 23 | 16 |
| 7 | 126 | 18 | 23 | 24 | 17 |
| 8 | 135 | 19 | 24 | 25 | 17 |
| 9 | 141 | 19 | 25 | 27 | 18 |
| 10 | 148 | 21 | 26 | 28 | 20 |
Skills
At specific levels, Troops gain skills that buff them in a certain way. Those gained by Lancers are as follows:
- Level 1: Charge – Increases Attack Damage to Marksman by 10%.
- Level 7: Ambusher – Attacks have a 20% chance to strike Marksman behind Infantry.
- FC3: Crystal Lance I – The Fire Crystal energy attached to the blade makes the lance indestructible and grants it a 10% chance of dealing double damage.
- FC5: Crystal Lance II – The Fire Crystal energy attached to the blade makes the lance indestructible and grants it a 15% chance of dealing double damage.
- FC8: Incandescent Field I – Fire Crystal energy that attaches to the lance forms a forcefield that grants the Lancers a 10% chance of taking half the damage when under attack.
- FC10: Incandescent Field II – Fire Crystal energy that attaches to the lance forms a forcefield that grants the Lancers a 15% chance of taking half the damage when under attack.
Marksmen
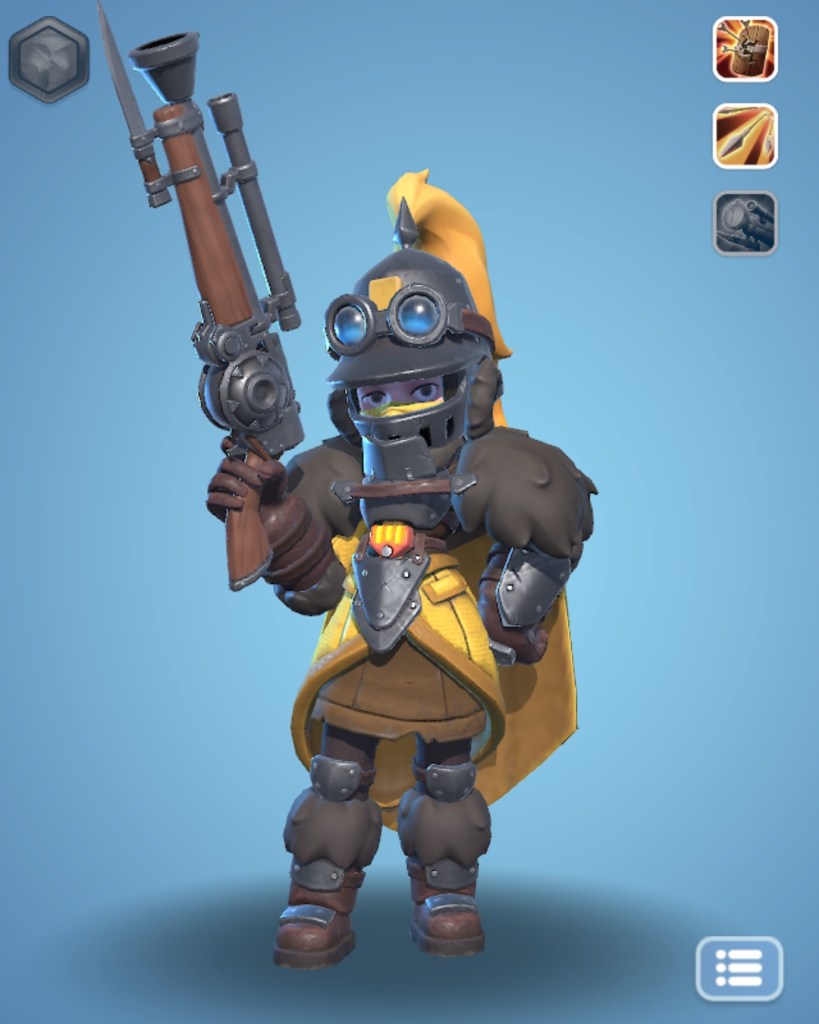
Marksmen are your primary damage dealers, essential for delivering high-impact attacks from the safety of the backline. They rely on other troop types to absorb incoming damage, allowing them to focus on unleashing devastating ranged strikes. However, their low defensive stats make them highly vulnerable if the enemy manages to breach your frontline. Marksmen excel at breaking through the enemy’s defensive lines, dealing 10% extra attack damage against Infantry. Their offensive power makes them a cornerstone of any strategy aimed at dismantling the opposition’s frontline quickly and effectively.
Cost
The below table outlines the total resources and time required to train 1 marksman at each tier. Make use of our Whiteout Survival Troop Training Calculator to calculate the total cost for training or promoting any number of troops.
| Tier | Meat | Wood | Coal | Iron | Time |
|---|---|---|---|---|---|
| 1 | 23 | 34 | 6 | 2 | 12 |
| 2 | 36 | 54 | 9 | 4 | 17 |
| 3 | 58 | 86 | 15 | 5 | 24 |
| 4 | 75 | 111 | 19 | 6 | 32 |
| 5 | 97 | 144 | 24 | 8 | 44 |
| 6 | 117 | 173 | 29 | 10 | 60 |
| 7 | 175 | 258 | 44 | 14 | 83 |
| 8 | 349 | 516 | 87 | 28 | 113 |
| 9 | 872 | 1,290 | 217 | 70 | 131 |
| 10 | 1,740 | 2,579 | 433 | 140 | 152 |
| 11 | 4,357 | 6,448 | 1,081 | 349 | 180 |
Stats
| Tier | Power | Defense | Lethality | Load | Attack | Health |
|---|---|---|---|---|---|---|
| 1 | 3 | 1 | 5 | 108 | 5 | 1 |
| 2 | 4 | 2 | 7 | 124 | 6 | 2 |
| 3 | 5 | 3 | 8 | 142 | 7 | 3 |
| 4 | 9 | 4 | 9 | 164 | 8 | 4 |
| 5 | 13 | 5 | 10 | 188 | 9 | 5 |
| 6 | 20 | 6 | 11 | 217 | 10 | 6 |
| 7 | 28 | 7 | 12 | 249 | 11 | 7 |
| 8 | 38 | 8 | 13 | 287 | 12 | 8 |
| 9 | 50 | 9 | 14 | 330 | 13 | 9 |
| 10 | 66 | 10 | 15 | 379 | 14 | 10 |
| 11 | 80 | 12 | 17 | 400 | 16 | 12 |
Fire Crystal
The table below highlights the stats of Infantry Fire Crystal Troops at each Fire Crystal level, focusing specifically on Tier 10 (T10) and Tier 11 (T11) troops. While Fire Crystal Troops can theoretically be built for all tiers from 1 to 11, in practice, you’ll primarily train T10s and T11s, as these are the most effective in battle. For simplicity, Load and Speed stats are not included, as they remain constant regardless of Fire Crystal level.
T10
| FC | Power | Defense | Lethality | Attack | Health |
|---|---|---|---|---|---|
| 0 | 66 | 10 | 15 | 14 | 10 |
| 1 | 71 | 11 | 16 | 15 | 11 |
| 2 | 76 | 12 | 17 | 17 | 12 |
| 3 | 83 | 13 | 18 | 18 | 13 |
| 4 | 88 | 14 | 19 | 19 | 13 |
| 5 | 94 | 14 | 20 | 21 | 14 |
| 6 | 99 | 15 | 21 | 22 | 14 |
| 7 | 104 | 15 | 22 | 23 | 15 |
| 8 | 110 | 16 | 23 | 24 | 15 |
| 9 | 115 | 17 | 24 | 26 | 16 |
| 10 | 121 | 19 | 25 | 27 | 17 |
T11
| FC | Power | Defense | Lethality | Attack | Health |
|---|---|---|---|---|---|
| 0 | 80 | 12 | 17 | 16 | 12 |
| 1 | 86 | 13 | 18 | 17 | 13 |
| 2 | 92 | 14 | 19 | 19 | 14 |
| 3 | 100 | 15 | 20 | 20 | 15 |
| 4 | 106 | 16 | 21 | 21 | 15 |
| 5 | 114 | 16 | 22 | 23 | 16 |
| 6 | 120 | 17 | 23 | 24 | 16 |
| 7 | 126 | 18 | 24 | 25 | 17 |
| 8 | 135 | 19 | 25 | 26 | 18 |
| 9 | 141 | 19 | 26 | 28 | 18 |
| 10 | 148 | 21 | 27 | 30 | 20 |
Skills
At specific levels, Troops gain skills that buff them in a certain way. Those gained by Marksmen are as follows:
- Level 1: Ranged Strike – Increases Attack Damage to Infantry by 10%.
- Level 7: Volley – Attacks have a 10% chance to strike twice.
- FC3: Crystal Gunpowder I – The Fire Crystal energy provided by the Fire Crystal enables the bullet to pierce through everything and grants it a 20% chance of dealing 50% more damage.
- FC5: Crystal Gunpowder II – The Fire Crystal energy provided by the Fire Crystal enables the bullet to pierce through everything and grants it a 30% chance of dealing 50% more damage.
- FC8: Flame Charge I – Fire crystal energy boosts the power of bullets, increasing Marksman’s basic attack by 4%, Marskamn can deal an extra 25% damage when Crystal Gunpowder is active.
- FC10: Flame Charge II – Fire crystal energy boosts the power of bullets, increasing Marksman’s basic attack by 6%, Marskamn can deal an extra 37.5% damage when Crystal Gunpowder is active.
Troop Management
By now, you should have a solid understanding of the strengths, weaknesses, and battlefield roles of each troop type. In this section of the Whiteout Survival Troop Guide, we’ll focus on maximizing your army’s potential. From efficient promotion and rapid training techniques to strategies for healing and managing deployment capacities, we’ll cover all the key aspects to help you build and maintain a formidable force.
Promotion
We’ve already covered the importance of troop promotion in our PvP Guide and Tips for Beginners, but it’s worth emphasizing here: promote your troops! As your state progresses, lower-level troops become increasingly ineffective, especially when facing higher-level enemy forces. Deploying them in battle is not only futile but can also backfire—when they’re injured, they occupy valuable space in your Infirmary, potentially leaving your higher-level troops unhealed and at risk of permanent loss. Promoting your troops ensures your army stays competitive and efficient in both offense and defense. The cost of promoting troops is the difference between the resource cost of their current level to that of the level you are promoting too. As such, overall there is no extra cost to do this.
Healing
Healing your troops efficiently is crucial to maintaining a strong army, and the key to this is batch healing. This method involves healing small groups of troops at a time, leveraging Alliance help taps to speed up the process. By contrast, healing all your troops at once after a major battle could take days or require a significant number of speedups, which is far less efficient.
Next up in this section of the Whiteout Survival Troop Guide, but still of equal importance, is your Infirmary capacity, especially if you’re actively engaging in PvP. A high Infirmary capacity ensures that injured troops are treated instead of being permanently lost. To maximize this, focus on upgrading your Infirmary, prioritizing research that boosts its capacity, and enhancing Daybreak Island Decorations that provide similar benefits.
Fast Training

Another key component of troop management in this Whiteout Survival Troop Guide is fast training. Whilst you can simply rely on speedups and time to build your army, this will leave you behind other players who focus on improving their troop training speed buff. Over time, this can massively reduce the time required to train your troops. The best places to improve this are as follows:
- Daybreak Island: Decorations such as the Barbecue Stand which increases training speed by 5% at its maximum level.
- Academy: Research such as Training Tools which increases training speed when upgraded.
- Buff: Purchase the 2h Training Capacity Enhance buff for 3,000 Gems which increases training speed by 200% for 2 hours.
- Buildings: Upgrade your troop training building to increase training speed.
Deployment Capacity
If you’ve read our Whiteout Survival Hero Guide, you’re likely familiar with the importance of deployment capacity in battle. Having a larger army to deploy gives you a significant edge from the outset, allowing for stronger assaults and better defenses. Your deployment capacity is primarily determined by the levels of the Heroes you send into battle and the level of your Command Centre. However, there are additional ways to boost this crucial stat. Conduct research at the Academy to unlock relevant upgrades, and enhance your Island Decorations that increase deployment capacity.
Ratios
Finally, in this Whiteout Survival Troop Guide let’s discuss ratios. When sending out your Troops to engage in PvP, the specific ratio to send will always be a complex decision. There is no simple answer to the best ratio but there are some general rules to consider when deciding which troops to send more of. In PvE events, the decision is often easy. For example, in Bear Hunt, you should send 100% Marksmen for most damage, and for Crazy Joe, it is best to reinforce allies with Infantry. Check out our Whiteout Survival Guides on both of these events for full details of why this is the case.
Unfortunately, in PvP, the answer is not so simple. For lower power players, it may simply be a case of following what your Alliance Leadership tells you to do. For example, if they ask for 30 30 40, this means they want you to send 30% Infantry, 30% Lancers, and 40% Marksmen. Ratios in chat will always follow this format, with the first number the % of Infantry required, the second for Lancers, and the third for Marksman. Typically, sending a higher proportion of Infantry is normal as these are the frontline and will soak up damage, allowing your Marksman and Lancers to chip away at the enemy. However, the specific ratios will vary from combat to combat depending on the composition of the enemy.
More Whiteout Survival Guides from OCG
- Tips for Beginners
- Best Heroes for F2P Players
- Hero Guide
- Exploration Hero Tier List
- Hero List
- Hall of Chiefs
- Best Formations for Exploration
- Fast Gathering
- Alliances
- Alliance Championship
- Daybreak Island
- Troops
- Fishing Tournament
- Expedition Hero Tier List
- Lucky Wheel
- Alliance Showdown
- Flame and Fangs
- How to Get Gems
- How to Increase Your VIP Level Fast
- PvP Tips for Beginners
- Gina’s Revenge
- Hot to Get and Use Teleports
- How to Win in Arena
- Bear Hunt
- Brothers in Arms
- Frostfire Mine
- Crazy Joe
- Beasts & Polar Terrors
- Troop Cost Calculator
- Treasure Hunter
- King of Icefield
- State of Power
- Tundra Trade Route
- Fortress Battles
Join our Community
If you found this Whiteout Survival Troop Guide useful, then join our community below to be kept up to date on any new Whiteout Survival Guides published along with other interesting posts from the website.