As with all the Best 4X Mobile Games, and as mentioned in our Whiteout Survival Tips for Beginners, Alliances play a crucial role in the game. Indeed, some of the best fun you will have in this game is driven by the friendships you will form in Alliances and the rivalries you will encounter with other Alliances. On top of this, there are simply tonnes of Alliance Events, such as Crazy Joe, Alliance Championship, and Bear Hunt, to name just a few. As such, understanding how Alliances work and how you can benefit from them is hugely important to your success, keep reading this Whiteout Survival Alliance Guide as we reveal all.
Table of Contents
What is an Alliance
Alliances in Whiteout Survival function like guilds, bringing players together to form powerful groups of cities. Being part of an alliance offers several benefits, including protection from other players, valuable buffs within alliance territory, access to alliance-only events, and more. Ideally, you should aim to join one of the top alliances in your State. These alliances typically perform better in events, yielding greater rewards, and provide stronger protection as other players are less likely to provoke a war with a leading alliance.
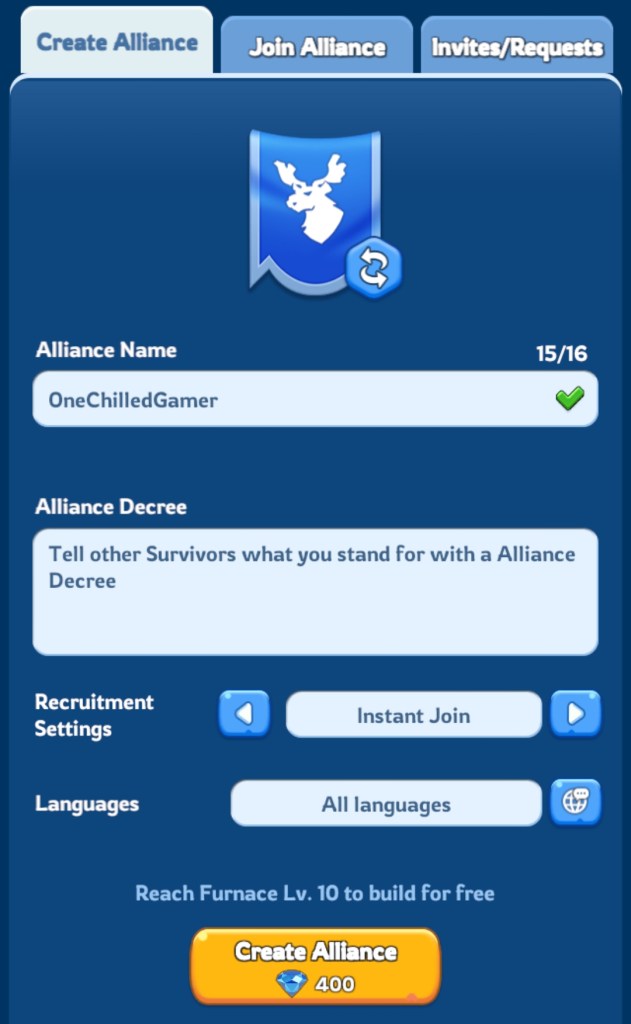
You can join an alliance once your Furnace reaches level 7, and it’s important to choose carefully. To find an alliance, go to your profile, select the Leaderboard button, and navigate to the Alliance Power section. Alliances are listed by power, allowing you to identify the best option available to you. Review the requirements of each alliance by selecting it; for example, an alliance may require a minimum Furnace level or a specific power threshold. Alternatively, you can create your own alliance for 400 Gems, though this cost is removed once your Furnace reaches level 10.
Level
Just like Heroes and Pets, Alliances also have levels. However, in this case, an alliance’s level determines the range of features available, such as access to the Bear Hunt and the ability to build Alliance HQs. Raising your alliance level is crucial to unlocking its full potential. The maximum level is 11, and progress is achieved through members contributing to Alliance Tech and completing their daily missions. Active participation by all members is essential to ensure steady growth and access to advanced features.
Ranks

Next up in this Whiteout Survival Alliance Guide let’s discuss Ranks. The leader of an alliance is referred to as the R5. This role holds full authority within the alliance, with the ability to perform tasks such as building Alliance HQs, changing the Banner, and removing players. While there can only be one R5, they can appoint an unlimited number of R4s to assist with alliance management. R4s have slightly fewer privileges than the R5 but can still perform significant duties, such as modifying decrees and updating the alliance bulletin.
Below the R4 rank are R3, R2, and R1 members, who share the same privileges but differ in terms of prestige. While higher ranks may carry some symbolic status, there are no tangible benefits to being promoted or demoted between these ranks. As such, members shouldn’t be overly concerned about their specific rank unless they are involved in alliance leadership or management.
Territory
Probably the most important subject to cover in this Whiteout Survival Alliance Guide is Alliance Territory. It is a vital feature in Whiteout Survival, as it represents an area on the map that your alliance controls, providing key strategic and resource benefits. By understanding how to establish, expand, and manage Alliance Territory, you’ll be better positioned to secure resources, boost Troop Stats, and enhance your defenses.
Benefits of Alliance Territory
- Territory Bonuses: When you place your city within your Alliance Territory, you gain a Territory Bonus, which provides advantages like increased gathering speed and boosted Troop Stats when defending. Placing your city in your alliance territory is essential to take advantage of these bonuses.
- Protection from Enemy Teleporting: Enemies cannot use Advanced Teleporters to move directly into your territory, making it more difficult for them to attack you and your allies.
- Alliance Resources: Alliance Territory also provides access to alliance resources. Every hour, resources are automatically gathered for your alliance (as shown at the top of the Territory screen), which support alliance research and infrastructure. You don’t need to gather these resources manually; instead, they are collected passively as long as your territory encompasses resource sites on the map.
Territory Buildings
- Alliance HQ: The first structure your alliance will build is the Alliance HQ, the foundation of your territory.
- Icefield HQ: This is the first headquarters you’ll build and marks the core of your alliance’s territory.
- Tundra HQ: The second HQ is unlocked through alliance research and can be placed in tundra land, expanding territory into fog-covered regions accessible later in the server’s progression.
- These HQs act as main entrances and anchors of your territory, and maintaining and expanding them will enable territory control.
- Alliance Banners: Alliance Banners are critical for expanding your territory. They create a 7×7 tile area of influence around each banner and must overlap with other banners or the Alliance HQ to connect territory sections.
- Banner Placement: Place banners to connect territory and ensure that any important locations, such as resource sites, fall within your alliance’s perimeter.
- Overlapping with Enemy Banners: Your banners can overlap with enemy banners, which can compromise territory boundaries. Prevent this by strategically placing banners to prevent gaps.
- Maximum Banners: Increase the number of Banners you can build via Alliance Tech.
- Connect: Banner placement is crucial for capturing facilities around the map. In particular, you need to have a path of territories to any facilities you want to capture before you are allowed to attack them.
- Resource Locations: These buildings are not constructed but rather are captured by enveloping them inside your territory. Much like Gathering, they are available for each resource type and when under your control will contribute towards your alliance resources.
- Hunting Trap: This is a special event building that must be constructed in order for your alliance to take part in the Bear Hunt Event. Check out our Bear Hunt Guide for help with choosing a place for the trap as well as tips on how to score high.
- Prestige Buildings: These are special buildings that can be constructed by meeting certain goals such as placing well in the Alliance Championship. They grant a range of buffs such as to resource-gathering speed.
- Championship Statue: Obtained based on an alliances tier in Alliance Championship.
- Pioneer: Restricted to alliances reaching Elite Tier in Alliance Mobilization.
- Foundry: Restricted to S-rated Foundry Battle alliances.
- Alliance Gathering Node: An alliance can place 1 Alliance Gathering Node at a time. These can be built for any of the 4 main resources, are protected from attacks, and last for 12 hours. Any number of alliance members can send Troops to Gather here.
Facilities
Next up in this Whiteout Survival Alliance Guide let’s take a look at Facilities. These are special buildings dotted around the map that can be captured by alliances in return for buffs. They can only be attacked if your alliance has territory connected to them. To capture you must occupy them for a continuous 30 minutes. Once captured you will hold them for 3 days during which time they cannot be captured by another alliance. The facilities, their buffs, and the number of each available are as follows:
| Facility | Level | Buff | Number |
|---|---|---|---|
| Construction | 1 | Construction Speed +5% | 8 |
| Construction | 3 | Construction Speed +8% | 4 |
| Defense | 2 | Troop Defense +5% | 8 |
| Defense | 4 | Troop Defense +8% | 3 |
| Tech | 1 | Research Speed +5% | 8 |
| Tech | 3 | Research Speed +8% | 4 |
| Weapon | 2 | Troop Attack +5% | 8 |
| Weapon | 4 | Troop Attack +8% | 3 |
| Gathering | 1 | Gathering Speed +5% | 8 |
| Production | 1 | Production Speed +5% | 8 |
| Training | 2 | Training Speed +5% | 8 |
| Expedition | 3 | Marching Speed +15% | 4 |
Please note that if your alliance controls 2 buildings of the same type and level then the buffs do not stack. However, buffs of the same type but from different levels will stack. In addition, be aware that attacking facilities does entail some risk in terms of severely injured Troops and losses based on the Facilities level:
- Level 1: 10% Severely Injured
- Level 2: 20% Severely Injured
- Level 3: 30% Severely Injured
- Level 4: 30% Severely Injured and 10% Losses
You can check the status of all facilities that your Alliance owns by navigating to the Alliance menu and then selecting the Battle button. Here, any that are listed as Vulnerable can be attacked by other alliances and will be captured if held for 30 minutes. If they remain un-attacked for 24 hours, then they will go back into 3 days of Protected for your Alliance during which time they cannot be attacked. Alternatively, if someone does attack your facility, and you manage to recapture it within 30 minutes, then you will only need to hold it for 30 minutes to enter Protected status.
Fortresses
Similar to Facilities, each State contains 12 Fortresses and 4 Strongholds that can be captured by alliances during the weekly Fortress Battles event. Alliance leadership must register for specific buildings they wish to target, and at the designated timeslot, your alliance will face off against others that registered for the same structure. The objective is to capture the building and secure substantial rewards for your alliance. For a detailed breakdown of how this event works, check out our Whiteout Survival Fortress Battles Guide.
Resources

Alliance resources are entirely separate from a player’s personal resources and are collected differently. Instead of being gathered manually, alliance resources are automatically accumulated when Resource Buildings, such as Iron Mines and Woodmills, are located within your Alliance Territory. Each building within your territory contributes a set amount of its resources to the Alliance’s stockpile every hour.
These resources are essential for upgrading Alliance Tech, which unlocks powerful buffs and benefits for all alliance members. Proper management and strategic expansion of territory to include high-value Resource Buildings are crucial for maximizing your alliance’s resource income and growth.
Tech

Alliance Tech allows members to contribute resources to unlock buffs and upgrades for their alliance. These buffs include increasing member capacity, improving Gathering efficiency, and enhancing PvP performance. There are three tech trees: Growth, which focuses on alliance development; Territory, for territory expansion; and Battle, to strengthen PvP capabilities. Each contribution costs resources and provides 100 Contribution Points to the tech, 100 Alliance Tokens to the player, and 100 Alliance EXP to the alliance. Once enough points are accumulated, the tech can be researched using Alliance Resources. Like individual research, completing a tech upgrade takes time.
Alliance leaders often assign specific techs for members to prioritize, indicated by a thumbs-up icon. Focusing on these techs may yield bonus rewards, such as extra Alliance Tokens, Contribution Points, and EXP. Contributing is also a great way to earn Gems daily, as alliances have a ranking system that rewards players based on their contributions. This makes participation in Alliance Tech not only beneficial for the alliance but also rewarding for individual players.
Help
The Help feature is one of the most valuable tools in this Whiteout Survival Alliance Guide, particularly during the early days of a new State when building and research times are relatively short. This feature allows you to request assistance from your alliance members to speed up construction or research projects. Each help reduces the timer by a certain amount, which increases as your alliance advances in Tech. Additionally, the number of helps you can receive can also be increased through Alliance Tech upgrades, making this an essential feature for rapid progression.
Shop and Best Use of Tokens

Joining an Alliance grants you access to the Alliance Shop, which expands its selection of items as the Alliance level increases. The shop is divided into a Daily Shop, which refreshes daily, and a Weekly Shop, which refreshes weekly. To purchase items, you’ll need Alliance Tokens, earned by participating in alliance activities such as the Bear Hunt and contributing to Alliance Tech. Some of the most valuable items to prioritize in the shop include:
- VIP EXP
- Advanced Teleporters
- Shields
- Speedups
Rallies
Being in an Alliance allows you to rally powerful Polar Terrors and event-specific Beasts such as Berserk Cryptids during Gina’s Revenge. Rallying these Beasts lets other members join you in the battle with extra Troops thereby increasing the ease with which you can defeat them. In addition, being in an Alliance also allows you to join the rallies of other players. Joining a rally costs no Stamina and is a great way to keep earning rewards. As mentioned in our Tips for Beginners, make sure you have Auto Join turned on so that you join rallies even when you are not in the game.
Events
Next up in this Whiteout Survival Alliance Guide, let’s quickly discuss events! There are quite simply a huge number of Events that are specific to Alliances only, such as Castle Battle, Crazy Joe, Bear Hunt, Foundry Battle, Alliance Mobilization, Fortress Battles, and many more. These alone are a great reason to join an alliance due to the rewards and fun they add to the game. Head over to our full list of Whiteout Survival Guides for more information on each of these events and more!
Tips for Alliance Leaders
- Start Early – to be a top alliance you’ll need to be one of the first formed and preferably have a couple of friends join to help you out. These first alliances will get most players early on which is a great place to build from.
- Kick – especially in the early days of a new state, be very strict about kicking inactive players. In this early period, player churn is very high, and if you want to remain one of the top alliances you will need to ensure everyone is active and growing in power.
- Delegate – you’re going to need a team of experienced R4s who you can trust to help manage the alliance. That can be from resolving quarrels internally and externally, to managing recruitment, and leading events. This will take a lot of pressure off you as the leader.
- Diplomacy – to be a successful alliance, whether you like it or not, you are going to need to engage in diplomacy with the other top alliances. This can be helpful for forming alliance, creating beneficial rules, and organising taking turns for facilities.
- Tech – when you first start an alliance, the Growth Tech Tree should be your greatest focus. Here you will find Tech that will help your alliance grow such as an increases member cap and an increased number of banners that can be built.
- Engage – don’t neglect the members in your alliance and try to ensure everyone feels involved or at least the majority are able to take part in the regular events such as Bear Hunt. Make use of the polling feature to help with this.
More Whiteout Survival Guides from OCG
- Tips for Beginners
- Best Heroes for F2P Players
- Hero Guide
- Exploration Hero Tier List
- Hero List
- Hall of Chiefs
- Best Formations for Exploration
- Fast Gathering
- Alliances
- Alliance Championship
- Daybreak Island
- Troops
- Fishing Tournament
- Expedition Hero Tier List
- Lucky Wheel
- Alliance Showdown
- Flame and Fangs
- How to Get Gems
- How to Increase Your VIP Level Fast
- PvP Tips for Beginners
- Gina’s Revenge
- Hot to Get and Use Teleports
- How to Win in Arena
- Bear Hunt
- Brothers in Arms
- Frostfire Mine
- Crazy Joe
- Beasts & Polar Terrors
- Troop Cost Calculator
- Treasure Hunter
- King of Icefield
- State of Power
- Tundra Trade Route
- Fortress Battles
Join our Community
If you found this Whiteout Survival Alliance Guide useful then join our community below. We will keep you updated on any new Whiteout Survival Guides we post, along with other interesting updates from the site.